Quick Cooking: Fast Easy White Rice

Fast Easy White Rice

I’ve heard “simplicity” discussed a lot as a goal for the new year, whether or not people are using that specific word. Along that line, here is recipe which yields very tasty rice in an absolute minimum of prep time.

Fast Easy White Rice

Perfectly chop-sticky rice is easier than you think. And so much easier than catching a fly with chopsticks.

If there is a faster, easier way to cook rice (which tastes as good) please tell me about it. A friend learned this method from a Korean woman who had obviously mastered simplicity, and I haven’t needed rice instructions (or a rice cooker) since. It is as easy to memorize as it is to make.

I don’t know if she rinsed her rice (probably) and purists will tell you that it gives you a slightly more perfect flavor to do so. For me that step isn’t necessary, and I love typing “2 minutes” as the active prep time (that’s probably overstated).

Is simplicity a goal of yours for the new year? What goals or resolutions do you have, in terms of your kitchen or your family’s diet? And if you save time this year by simplifying your life, what more important things are you excited to spend that time doing? Please tell me in the comments.


Recipe: Fast Easy White Rice

Summary: Cooking rice doesn’t get any easier than measuring the water with your finger and setting the timer. The only key to this recipe is to find the right sized pot for the amount of rice you need, as explained below.

Ingredients

  • dry white rice (any amount you choose)

Instructions

  1. Place the dry rice into a pot which is sized so the rice fills it 1/4 to 1/2 way (a larger pot will throw off the water ratio, and a smaller pot may overflow).
  2. Fill with water until the water covers the rice by 3/4 of an inch (from the tip of your finger almost to the first knuckle).
  3. Cover and cook over moderately high heat until it starts to boil (the lid will start to rattle).
  4. Turn off the heat but leave the pot in place and covered, and let sit for 10 minutes.
  5. Fluff the rice with a rice paddle or fork, and serve.

Preparation time: 2 minute(s)

Cooking time: 15 minute(s)

Diet type: Vegetarian

Number of servings (yield): 4

Tagged with: , , , ,
Posted in Dinner, Fast, Recipes, Techniques, Uncategorized

Gingerbread Manor and Dual-Purpose Dough: An Awesome Gingerbread house

Gingerbread Manor
Gingerbread Manor

Each of my daughters was given creative authority over one side. Smart mom.

My wife and girls really rocked the gingerbread house this year, don’t you think? I’m loving the high facades, snowy landscape, and inhabited interior.

I’ve generally believed that a gingerbread recipe can only be good for one purpose: eating or building, not both. But this year my wife found this recipe which definitely stood up to construction demands, and made for good eating too. And this is very tasty dough if you use pasteurized eggs to allow for safe sampling.

Do you have a favorite gingerbread recipe…or two? I’m curious where others stand on the single-purpose vs double-purpose dough issue. And what have you done to add interest to your gingerbread creations? Please tell me in the comments.

And Merry Christmas everyone. You know that today is only day three of twelve, right?

Gingerbread Inhabitants

C’mon inside – it’s all rainbow-sprinkly in here!

Sprinkling Snow Method

Paint brushes spread frosting over the landscape, before the strainer and spoon dropped the “fresh powder.”

Blue IS a Christmas color, unless you want to mess with my 4-year-old. Looks nice, yes?

Tagged with: , , , , ,
Posted in Fun, Holidays, Kid Friendly, Recipes, Techniques

Broc Speed: Pan-Seared Three Ingredient Broccoli

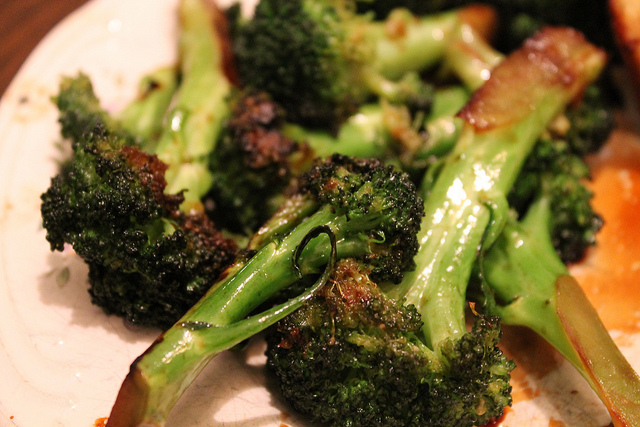
Finished broccoli

Restaurant Worthy, Family Worthy

I wrote an early post about heat as a main ingredient, how it adds huge flavor without adding calories. Perfect for “fast families,” this new broccoli recipe adds nothing but a bit of oil and soy to the broccoli, and cooks in record time. In spite of speed and simplicity I believe it’s worthy of any restaurant (of course, most restaurants don’t do veggies justice anyway). More importantly it’s quickly gobbled up by our kids, and I hope yours as well. Will you “test it” on yours? Please tell me in the comments how it rates with your family. There are few things as satisfying as watching kids happily eat vegetables, am I right?

Finished broccoli

Supersoynic? Soy sauce added towards the end delivers flavor and a little steam, to quickly finish the cooking.

Recipe: Pan-Seared Three Ingredient Broccoli

Summary: This recipe requires careful watching (cooking times are precise), but results in great flavor in almost no time at all. You can double the broccoli if your pan is sufficiently large, but increase the oil and soy just slightly to about 2 tablespoons each.

Ingredients

Broccoli In Pan

The wider your pan the better, as it allows more of the broccoli to contact the hot surface. Taller pots work fine too.

  • 1 1/2 tablespoons olive oil
  • 1 head of broccoli, about 1/2 pound
  • 1 1/2 tablespoons soy sauce

Instructions

    1. Cut the broccoli lengthwise into individual spears so the stem portions are no bigger around than your finger.
    2. In a wide heavy-bottomed pan or skillet, heat the oil over medium-high heat until it just begins to smoke.
    3. Add the broccoli to the pan, carefully using tongs to avoid splatter. Reduce heat to medium, cover, and cook for exactly two minutes.
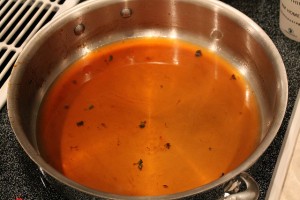
Pan deglazed with water

You can ease cleaning by adding some water to the pan while it is still warm, after removing the broccoli. A quick stir with a spatula will dissolve the browned bits easily.

  1. Shake the pan to release the broccoli, and flip over each piece using tongs so it doesn’t continue cooking on the same side. Carefully drizzle the soy sauce over the broccoli and replace the cover. Cook for one more minute.
  2. Once again shake the pan, turn the spears with tongs, replace the lid, and cook for one additional minute. The broccoli won’t be completely soft, but should be cooked through, and browned in places but not burned.

Active time: 7 minute(s)
Total time: 10 minute(s)

Diet type: Vegetarian

Number of servings (yield): 3-4

Tagged with: , , ,
Posted in Dinner, Fast, High Heat, Kid Friendly, Recipes, Techniques

Quick Cooking Techniques: Speed In The Kitchen – What Does Fast Mean To You?

Businessman running with stroller

Quick Cooking Techniques


Coming soon are posts on being extremely fast with food. Kitchen speed is hugely important because: (a) if this blog helps you make food much faster you can read every post and that time will “pay” for itself (right?), (b) family life is always busy, and (c) if a home-cooked dinner would take too long there are easy and less healthy alternatives ready to sabotage your good intentions, like ordering pizza.

Here’s where I need your help. What complicates the issue for a blogger like me is that everyone defines “fast” differently. What’s most important to you?

Businessman running with stroller

Ever feel this way? Image Copyright 2010 Ursula Deja-Schnieder

If you can put a Crock-Pot meal together in 5 minutes and let it cook for 4 hours, do you call that fast (a short “active” prep time)? Or is total prep time more important, as in you come home from work and need dinner to take 15-20 minutes start to finish? Or maybe you are looking to cook more interesting meals than these but need a 50-minute recipe streamlined down to 30? What other criteria do you have, and is there a threshold for when something becomes too long (like x number of ingredients)? Last question, are there specific aspects of your “food life” that you need to go more quickly?

Your vote counts! Thanks for telling me what matters to you.

Tagged with: , , , ,
Posted in Fast, Food Articles, Philosophies, Techniques

Vodka Oil Butter Pie Crust

I developed this recipe over the years by combining the three best pie crust concepts I’ve encountered. The end result really is as great as it sounds. If you don’t care about the “why” behind these ingredients, skip right down to the recipe. Enjoy!

Vodka for tenderness
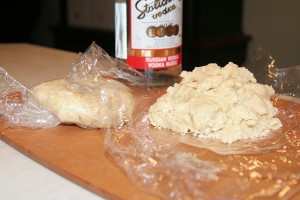
Processed pie dough on plastic wrap

Chilling the dough is essential with these ingredients. Use only high quality Vodka if you plan to sip.

Cook’s Illustrated pioneered the idea to substitute Vodka in place of some of the water for moistening. The idea is that water toughens the dough in a way that Vodka doesn’t. I believe it also evaporates better than water which is what pushes open the pockets between layers as the bits of solid fat (butter or shortening) melt away. You can’t taste the Vodka after cooking, but it’s definitely there in the raw dough. The recipe still works with all water if you prefer.

Butter for flavor

Finished Apple PieButter is a little harder to work with than shortening, but butter wins hands down on flavor, no comparison. Pie is one of those things some people learn once and repeat the same way for years. So if you learned pie-making back when margarine and Crisco were “modernizing” us away from butter, it’s time to bring back butter’s flavor punch. What’s hard about butter? It has a very narrow temperature range in which the bits of butter will compress properly into layers as you roll, while not being so warm that they melt into the dough prematurely. Follow the directions, work quickly, and you’ll be fine.

Oil to coat the flour

The Oregonian’s FOODday did a piece a few years back “admitting” that oil-based pie crusts can be extremely tender and flaky despite their lack of the reliably present “pea-sized bits” of solid fat in other recipes. The reason this works is that the oil coats the flour and allows it to separate from itself rather than binding with gluten. This also cuts down on the amount of butter. Healthy pie?

Recipe: Vodka Oil Butter Pie Crust

If you don’t have a food processor the butter can be cut using a pastry cutter or two knives. Whatever method you use be sure to work quickly during all steps so the dough remains cool throughout.

Finished pie on fork

Ingredients

  • 1/2 cup (1 stick) butter
  • 2 1/2 cups all-purpose flour
  • 1 tablespoon sugar (optional)
  • 1 teaspoon salt
  • 1/3 cup mild tasting vegetable oil
  • 5 tablespoons ice water
  • 2 tablespoons Vodka, chilled

Optional glaze for double pie crust:

  • 1 egg white, beaten
  • 1 tablespoon sugar

Instructions

  1. Cut the butter into approximately 1 centimeter squares, and place in the freezer for 10 minutes.
  2. Place the flour, sugar if using, and salt in a food processor and process to combine. Add the chilled butter cubes and process using one second pulses until the butter is in pea-sized bits, about 6-10 pulses.
  3. Pour the vegetable oil over and incorporate with a few very quick pulses. Sprinkle the water and vodka over, using 3-5 more very quick pulses to moisten the dough.
  4. Lay out two sheets of plastic wrap, and divide the dough between them (if you are making a double crust pie one should have slightly more dough than the other, for the bottom). Pull the sides of the plastic wrap up and twist them together (release the air as you press the dough together gently through the wrap) to form each into a round disk about 1 1/2 inches tall. Place in the refrigerator for 30 minutes, or up to a day.
  5. Preheat the oven to 375 degrees, placing a pizza stone or cookie sheet in the oven, which will transfer extra heat to the bottom.
  6. Bring the discs out of the refrigerator and place on the counter for 5 minutes (10 minutes if refrigerated overnight) to warm just slightly. Dust your rolling pin and rolling surface with flour, dusting heavily in the spot where you will place the disk. Unwrap and roll out one disk at a time, rolling from the center out, to about 1/8-inch thickness.
  7. Assemble the pie(s) according to your pie type and recipe. For a double-crust pie be sure to cut holes in the top crust, and if desired, brush with a beaten egg white and sprinkle with 1 tablespoon of sugar. Place in the oven on the prewarmed pizza stone or cookie sheet, and bake until the filling is set or bubbling and the crust is golden brown, typically about 50-60 minutes for a double crust pie.

Preparation time: 10 minute(s)

Total time: 50 minute(s)

Diet type: Vegetarian

Number of servings (yield): 6

Culinary tradition: USA (General)

Microformatting by hRecipe.

Tagged with: , , , , , ,
Posted in Dessert, Recipes

Archives

Join Me On Facebook!

Follow Me On Twitter!

Latest Pins on Pinterest

  • 37 Must-See Cheats That Will Help You In Your Next Home Interior Project

  • FURNITURE ARRANGING KIT 1/4 Scale Interior Design

  • microscale furniture templates

  • quarter inch scale templates, pg 1. No photos of what the furniture looks like.

  • Free Printable Furniture Templates | furniture template

  • furniture drawings to scale | With these tips you should be on your way to a good start or if you ...

  • Follow Me on Pinterest