Rock Candy Recipe
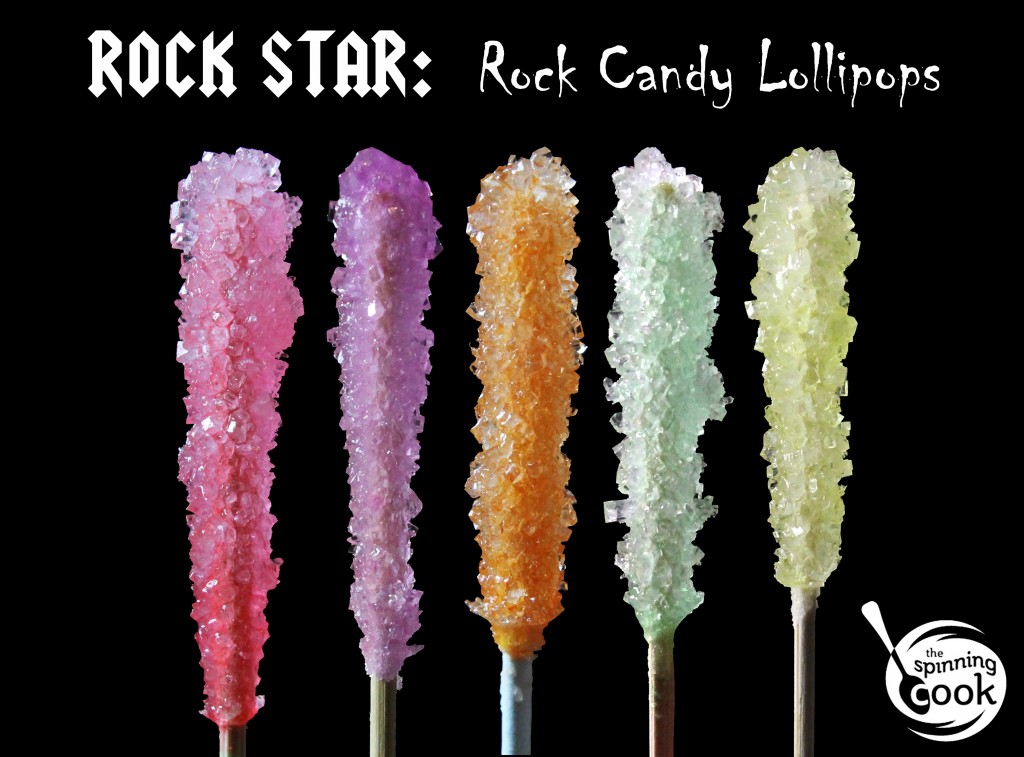
It was a case of a rock star gone pop. Lollipop, that is.
My girls were raving fans of a successful experiment we did out of a science kit, growing rock candy crystals in a jar. In that experiment we hung a sugar-coated string down into some sugar syrup, which results in crystals coating the string and jar. But when you all told me on facebook that you wanted a Spinning Cook rock candy recipe, I knew that it had to be lollipops.

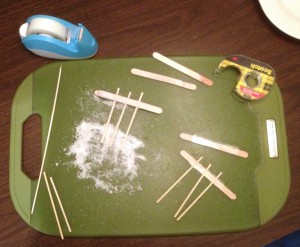
Here is how I connected three pops in a line between two tongue depressors with double-sided tape. A clothespin is much easier, if you only need to make a few.
The biggest complaint I’ve seen regarding other rock candy recipes, is that they sometimes don’t successfully form crystals, or take a really long time to do so. While I hate to criticize, many recipes simply have the wrong sugar ratio, or unclear instructions. But you and your young scientists deserve a reliable outcome. I can assure you that after extensive testing, this method works. It has also been simplified down to a minimum of steps; follow them carefully and you’ll have a household of happy scientists.
| Rock Candy Lollipops Recipe | | Print |
- 1 cup water
- 3 cups white sugar, plus more for sprinkling
- food coloring (optional)
- ½ teaspoon flavor extract, such as cherry or vanilla
- Special Equipment:
- 2-3 small to medium heat-proof canning jars (jelly jars work well)
- 4-12 round bamboo skewers or cake pop sticks
- clothespins or tongue depressors, for holding the sticks
- 2-3 small plastic bags
- Start heating the water in a medium pan over medium-high heat. Pour the sugar into the center of the pan, and continue to heat without stirring, until it boils. Let it continue to boil rapidly for two full minutes, then remove it from the heat. The syrup should now be clear, not cloudy or grainy (if it is not clear, continue boiling for another minute or two).
- Carefully pour the hot syrup into your canning jars to an equal depth, which should be at least 3 inches in each jar. Add the flavoring extract to the jars (you can use different flavors in each, but ½ teaspoon is about right for the total amount). Add a different type of food coloring to each jar, and give each jar a quick stir. Cover each jar loosely with a small plastic bag.
- Dip each stick into the syrup about three inches, then sprinkle it on all sides with granulated sugar over a piece of parchment paper or wax paper (you don't want these sugar crystals getting into the jars at this point). Set the sticks on the parchment or wax paper to dry. Set the timer for one hour, which will allow the syrup to cool while the sticks are drying.
- After an hour has passed, use a spoon to gently lift off any hard coating which has formed on the surface of the syrup in the jars and discard (don't scrape or chip away, just lift away the big chunks). Next, prepare the sticks to be inverted down into the syrup. If you only want 2-3 lollipops per jar you can simply pinch each stick with a clothespin, and set the clothespins across the mouth of the jar. If you want to make more than this, use tongue depressors, two-sided tape, and scotch tape as follows. Apply two-sided tape to two wooden tongue depressors, place three lollipop sticks between them with the tape facing in, and then wrap scotch tape around the two tongue depressors to hold them tight. Using either tongue depressors or clothespins to hold them, now place the sugared sticks down into the syrup so they are at least ½ inch from the bottom of the jar. Cover each jar again with the plastic bag.
- Place the jars somewhere out of the way, and gently jiggle them about once per day to ensure that they are not connecting to crystals on the bottom, top, or sides of the jar (or each other). Wait 3-5 days for the lollipops to reach your desired size, then remove, and dry for a couple of hours before serving. Drying can be done on wax or parchment paper, or hanging inside a clean jar to avoid a flat spot. If using long bamboo skewers, these should now be trimmed down to a reasonable handle size of 3-4 inches. Once fully dried the lollipops can be kept indefinitely in a sealed container.


Very cool!
Alex (10) did this has his science experiment at last years science fair. Our issue was the crystals formed on the bottom of the jar and then grew up the string. We couldn’t break the stick apart from the jar.
That’s exactly what happened with our own first experiment, Amanda. Very frustrating! The kids still loved it, but it was no fun hacking away with a big spoon to get the crystals out for them.
This recipe will make it easy to remove the lollipops, which should remain “unstuck” throughout (if they do start to crystallize to the bottom, break them apart and raise them up higher). When you are finished there will be some crystals on the bottom of the jar; remove these by setting the jars in a pan of water on the stove, sitting atop a steamer stand or dish cloth (something to prevent the jars from directly touching the bottom of the pan). A few minutes in hot water like this should release the crystals.
This is awesome! I used to love making rock candy as a kid, but you’re right that it didn’t always work. Thank you for making a foolproof recipe!
Thanks Colleen! It was a fun learning experience, and I have to give special thanks to my wife for putting up with many different test jars sitting around the house, proving and disproving different approaches. Enjoy!
I read a recipe that says to put these in a sunny location. Can they be made in the winter?
Hi Denise, thanks for the question. Yes, they can be made in winter. And the sun shouldn’t be a factor. We made some on the counter, and in other cases we put the jars on the top of bookshelves to be out of the way and less likely to be tipped over. Wouldn’t that be a gooey mess! They worked great, as long as the syrup was concentrated enough with sugar (as per this recipe), which seems to be one of the main reasons other rock candy recipes can sometimes fail.
I plan to make this with a group of kids in a class I teach. Do you think this will work if I make the sugar solution the night before and then let the kids add the flavoring/color of their choice in the morning to their personal jars? I purchased glass jars for the kids to use.
Yes, that should work great! I hope they really enjoy it, should be a fun experience.
Ryan
can you reheat after batch one is done to reuse the syrup?
Absolutely! Heat until all crystals are fully dissolved, and then pour into a clean mason jar.
love it!!!!!!!!!!!!!!!!!!!!!!!!!!!!!!!!!!!!!!!!!!!!!!!!!!!!!!!!!!!!!!!!!!!!!!!!!!!!!!!!!!!!!!!!!!!!!!!!!!!!
Thanks so much for this! You may have saved my daughter’s science fair project! How important is it to remove the crust on the top of the jar? Do you only need to remove enough to insert your stick? We weren’t able to get it all and what fell to the bottom is growing crystals there. We also had read on other sites to warm the jars before filling to prevent breakage and to avoid crystals growing on the sides. We did that, we let the solution cool in the pan for about 15 min before ladling it into the jars, and we let the sticks dry overnight. Otherwise, we followed your directions. Would any of our changes have adverse affects? We do have crystals growing and we started them only last night.
Hi Chris, glad it is growing so well! No need to work too hard on the top crust; the more you disturb it the more you will have crystals growing wild where you don’t want them. So you are correct, just make room to insert the stick and you should be fine. I don’t think the other steps you mentioned will cause issues; sounds like a good plan!
Hi! Thanks for this recipe! How close together can I put the sticks? You had mentioned using jelly jars, but I was wondering how 3 or 4 sticks would fit in each without being too close together and eventually sticking together. 🙂 Thanks!
You can put them fairly close, it just depends how wide you intend to let them grow. So visualize that and place them at least that far apart, then monitor them as they expand. Make sense? Have fun!
Ryan
Hi, my name is Emma, I’m in sixth grade. I am doing my science fair project on rock candy. Could you please answer some questions for me?
How long does it take to make good rock candy?
What is the process of making rock candy?
What temperature should rock candy be stored at and does hot or cold effect it?
Does rock candy expire?
How big should rock candy be?
Do flavors or colors effect it?
Thank you!
Hi Emma, great questions! Rock candy takes 3-5 days to form. The method for creating it can be found here in the recipe. It should be stored at rooms temperature and can become sticky at hotter temperatures; cold temperatures should not cause any issues. It does not expire. Size is a matter of personal preference. Most flavors and colors mix easily into the sugar solution and do not effect the outcome. I hope that helps. Have fun with your project!
Ryan,
What kind of colourant do I need to use, old fashion or gel?
I’ve used old fashioned liquid food coloring. Haven’t tried gel. Let me know how it works, if you try! Sorry for my slow response, we get a lot of spam comments and sometimes it is hard to sort through those to find legitimate comments like this one!
Thanks for this delightful recipe! It worked perfectly! I used shish-kabob sticks, and got a nice amount of crystals in about 6 days; I packed them in Cello Candy bags from the Wilton collection in many craft stores. As for the large amount of crystals on the bottom, I boiled water and submerged the canning jar I was using into the water until it loosened. On wax paper, it dried and I set that in a bag, too, as it has that nice crunchy texture! A happy 100% success!